
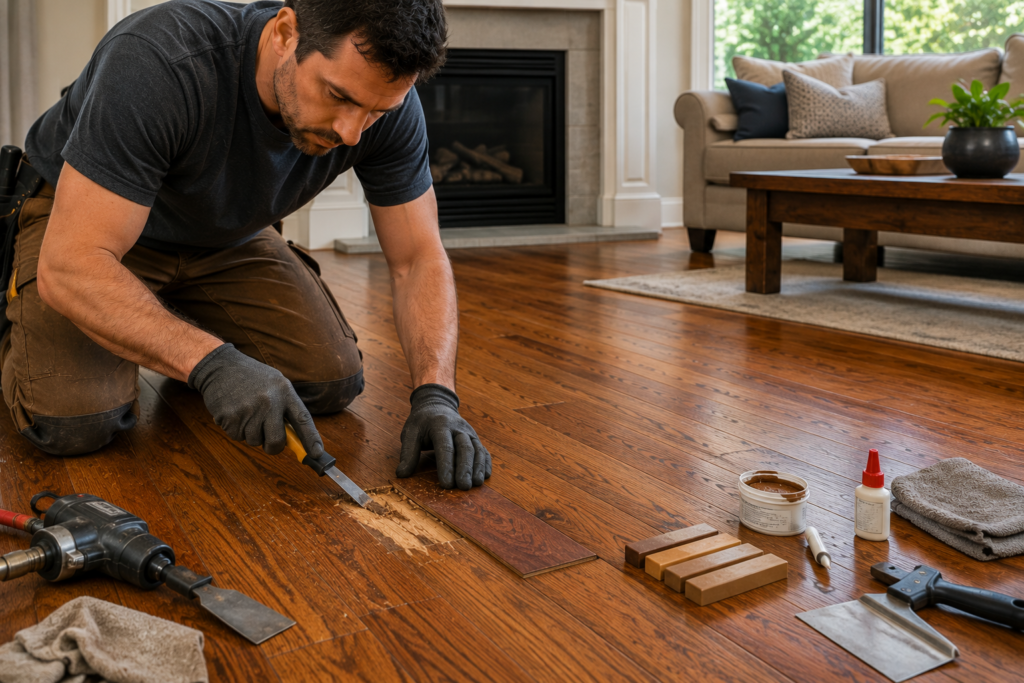
There is a specific kind of frustration that comes with looking down at a beautiful hardwood floor that has seen better days. A gouge near the entryway. A patch of cupped boards in the kitchen. A section of faded, scratched finish in the hallway that catches every bit of light in the worst possible way. You know the floor has more life in it. You just need to know how to get that life back out.
The difference between a repair that looks patched and one that looks professional almost always comes down to process. Professionals do not just fix the visible problem. They work through a sequence that addresses the cause, prepares the surface correctly, and applies the solution in layers that hold up over time. This guide walks you through that exact process so you can approach your own floors with the same informed confidence.
Whether you are handling minor surface damage yourself or getting ready to bring in expert help for hardwood floors repairs that go deeper than a weekend project, understanding how the work is actually done puts you in a much better position.
Reading the Damage Before You Touch Anything
The single biggest mistake homeowners make is jumping straight to a solution before they fully understand the problem. A professional always starts with a thorough read of the floor, and that assessment shapes every decision that follows.
Surface Damage vs. Structural Damage: Knowing the Difference
Think of your hardwood floor as having two distinct zones. The finish layer on top is like the paint on a car. The wood itself underneath is the body. Most damage lives in one zone or the other, and occasionally both. Scratches that only catch your eye in certain light are almost always finish damage. Scratches deep enough to snag your fingernail are in the wood. Boards that flex or feel spongy underfoot point to subfloor problems. Boards that have shifted vertically relative to their neighbors signal structural movement.
Getting this distinction right up front determines whether you need a touch-up marker or a subfloor rebuild. Those are very different projects, and treating one like the other wastes time and money.
The Most Common Types of Hardwood Floor Damage
Most hardwood floor problems fall into recognizable categories: surface scratches and scuffs from furniture and foot traffic, deep gouges from dropped objects, finish wear and clouding in high-traffic areas, cupping and crowning from moisture imbalance, gapping between boards from seasonal wood movement, staining from pet accidents or water exposure, and boards that creak or shift because of loose fasteners or subfloor separation. Each of these has a distinct repair path. Knowing which one you are dealing with before you buy a single product or pick up a single tool is where professional thinking starts.
Professional Techniques for Fixing Scratches and Worn Finish
Scratches are the most frequent complaint and also the most frequently mishandled repair. The instinct is to find something that matches the wood color and fill the mark. That is part of it. But professionals think about the repair in layers rather than as a single step.
The Layered Approach Professionals Use on Scratched Floors
A professional scratch repair starts by cleaning the area thoroughly. Wax residue, cleaning product buildup, and oil from foot traffic all interfere with adhesion and color matching. Once the area is clean, the depth of the scratch determines the fill material. Shallow finish scratches get a topcoat touch-up. Scratches into the wood get a color-matched filler applied first, allowed to cure, then leveled with a fine sanding block, then sealed with a compatible finish coat that ties the repair into the surrounding floor.
That sequence matters. Skipping the leveling step leaves a repair that feels raised. Skipping the topcoat leaves a repair that looks different because the wood filler absorbs light differently than the finished surface around it.
Choosing the Right Fill Color and Finish Sheen
Color matching is where a lot of DIY repairs fall apart visually. Wood floors are not one uniform color. They have variation, grain patterns, and tonal shifts from board to board. The best approach is to match the mid-tone of the surrounding boards rather than the darkest or lightest point. Most professional floor repair kits include multiple colors meant to be blended together for this reason.
Sheen level matters just as much as color. A glossy touch-up on a satin-finish floor will catch the eye immediately. Match the sheen to the existing finish and the repair becomes something people have to be told to look for.
When Spot Refinishing Is the Right Call
When scratches are concentrated in one area but the surrounding finish is still in decent shape, spot refinishing gives you a cleaner result than trying to address each mark individually. The process involves lightly sanding the damaged section to bare wood, feathering the edges outward to blend with the existing finish, applying stain if the floor is stained, and then finishing with multiple topcoats that are buffed between coats. Done well, spot refinishing is essentially invisible from any normal viewing distance.
How Professionals Tackle Water Damage and Warped Boards
Water damage is the most complex hardwood floor problem to fix, not because the repair itself is complicated, but because skipping the diagnostic phase leads directly to the same damage coming back after the repair is complete.
Finding the Source Before Fixing the Floor
This is the step that separates professional repairs from amateur ones. No one who knows what they are doing touches a water-damaged floor until the moisture source is identified and eliminated. Common culprits include appliance leaks, plumbing failures inside walls or under slabs, foundation seepage, and failed vapor barriers beneath the subfloor.
If you suspect a plumbing problem is contributing to your floor damage, pipe leak detection services should be part of the process before any floor repair begins. Fixing the floor over an active leak is like painting over rust. The problem simply keeps going underneath your work until it surfaces again, worse than before.
What Happens When Moisture Gets Ignored Too Long
Wood that stays wet long enough does not just cup or stain. It begins to break down at the cellular level, becoming soft, dark, and eventually structurally compromised. Subfloor materials beneath can swell, delaminate, or develop mold. At that stage, the repair scope expands dramatically. Boards that might have been salvageable with early intervention need full replacement. Subfloor sections need removal and rebuilding. What started as a localized problem turns into a multi-day project with a much larger material cost.
This is exactly why fast action after any water event matters as much as the repair technique itself.
The Drying and Restabilization Process Explained
Once the moisture source is eliminated, the drying process begins. Professionals use commercial dehumidifiers and airmovers to accelerate moisture removal from both the wood and the subfloor. Moisture meter readings taken at multiple points across the affected area track progress and tell you when the wood has returned to an acceptable moisture content level for your region.
In Portland, where ambient humidity runs higher than in drier climates, acceptable moisture content in hardwood floors typically falls between six and nine percent. Once the readings stabilize in that range, you can assess how much the boards have recovered on their own and determine what mechanical repair, if any, is still needed.
Replacing Individual Boards Without Disturbing the Rest of the Floor
Sometimes a board or a small section of boards is too far gone for surface repair. It needs to come out and be replaced. Professionals do this routinely without touching the surrounding floor, and the key is controlled removal.
How to Remove a Damaged Board Cleanly
The process starts with a circular saw or oscillating multi-tool set to cut just through the plank thickness without cutting into the subfloor below. Cuts are made along the length of the board close to each edge, then across the width at each end. The center section lifts out first, then the edges are carefully pried away from the tongue and groove joints on each side. Done with care, this process leaves the neighboring boards completely undisturbed and ready to accept a new plank without any gap or forced fit.
Matching Wood Species, Grain, and Stain Color Like a Pro
Board replacement only looks professional when the new board genuinely blends with the existing floor. That requires matching three things: species, grain character, and finish color. Species is the easiest. Grain character is trickier because it varies from board to board, and a tight-grain replacement in a floor with open, rustic character stands out immediately. Stain color matching is best done by testing samples on scrap wood before committing to a color on the installed board.
Professionals often source replacement boards from reclaimed wood or from the same flooring run as the original installation when it is available. Reclaimed wood in particular can offer a pre-aged appearance that blends naturally with existing floors that have years of patina on them.
Refinishing Hardwood Floors the Professional Way
When surface damage is widespread and touch-up repairs are no longer keeping up, full refinishing is the right move. It is the most involved repair process on this list, and also the one where technique makes the biggest difference in the final result.
Sanding Sequence and Why It Matters
Professional floor sanding always follows a progression of grits rather than jumping straight to a fine paper. A typical sequence might start at 36 or 40 grit to remove the old finish and level any height differences between boards, move to 60 grit to remove the scratches left by the coarser paper, then 80 grit to refine the surface further, finishing with 100 or 120 grit to prepare the wood for stain or finish. Each grit removes the scratch pattern left by the previous one. Skip a step and those deeper scratches show through the finish as a visible pattern across the floor.
Edge sanding along walls and corners requires a detail sander or hand scraping because drum sanders cannot reach those areas. Blending the edge work seamlessly with the field of the floor is a skill that takes real practice. Visible lines between the edge work and the center are one of the most common signs of an inexperienced refinishing job.
Applying Finish Coats for a Result That Actually Lasts
Professional finishes are applied in multiple thin coats rather than one thick one. Water-based polyurethane, oil-modified polyurethane, and hardwax oil are the most common choices for residential work. Between each coat, the floor is lightly abraded with a fine screen or pad to knock down any dust nibs and improve adhesion for the next coat. The final coat is left undisturbed to cure fully before foot traffic or furniture return.
Rushing the finish schedule is the single most common cause of finish failure in the months after refinishing. A floor that is walked on before the finish has fully hardened develops wear patterns and adhesion failures that shorten the life of the entire job dramatically.
Knowing When the Job Needs a Professional Set of Hands
There is no shame in recognizing that some repairs are beyond what a confident homeowner should take on alone. Sanding is a skill that can go wrong in ways that require starting over entirely. Moisture damage with subfloor involvement needs diagnostic tools most people do not own. Stain color matching on existing floors is genuinely difficult without experience.
If the damage covers more than a few boards, if moisture is involved and the source is unclear, if the floor needs full refinishing across multiple rooms, or if you have tried a repair and it has not gone the way you hoped, that is the right moment to bring in a professional. The hardwood floors repairs team at All Seasons Floors handles all of these situations regularly. We assess, diagnose, and repair with the kind of attention that makes the end result look like the damage never happened.
Conclusion
Fixing damaged hardwood floors like a professional is fundamentally about process. It starts with an honest read of the damage, moves through the right sequence of preparation and repair, and finishes with materials and techniques that hold up over time rather than just looking good for a few weeks. The floors in your home have history and value built into every plank. Most of the time, that value is absolutely worth preserving, and the right repair approach makes that possible without the disruption and expense of replacement. Start with what you know, take it one step at a time, and do not be afraid to ask for expert help when the job calls for it.
Frequently Asked Questions
1. How do professionals match stain color when replacing a single board in an older floor?
The process involves testing multiple stain shades on scrap pieces of the same wood species, letting each dry fully since stain colors shift significantly as they cure, and comparing the dried samples to the existing floor under the same lighting conditions the finished floor will live in. It often takes several tests to land on the right blend, which is why rushing this step leads to obvious mismatches.
2. Can a floor that has been cupped from water damage be flattened without replacing the boards?
In many cases, yes. If the cupping is mild to moderate and the moisture source has been fully addressed, the boards can flatten on their own over several weeks as moisture equalizes throughout the wood. More significant cupping may require light sanding after the drying process is complete to level the surface, but replacement is often avoidable when the damage is caught and the moisture stopped quickly enough.
3. How many times can a hardwood floor be refinished before it needs to be replaced?
Solid hardwood floors can typically be refinished five to eight times over their lifetime depending on the original plank thickness and how much wood is removed with each sanding. Engineered hardwood can be refinished one to three times depending on the veneer thickness. A professional can measure the remaining wood above the tongue to tell you exactly how many refinishes your specific floor has left.
4. What is the drying time between finish coats during a professional refinishing job?
Water-based finishes typically require two to four hours between coats under normal conditions. Oil-modified finishes take eight to twenty-four hours between coats. These windows are minimums and can extend in cooler temperatures or higher humidity environments like Portland in winter. A professional will test adhesion and hardness before applying the next coat rather than relying solely on the clock.
5. Is it possible to refinish hardwood floors without the strong smell associated with traditional finishes?
Yes. Water-based polyurethane finishes have significantly lower VOC levels than oil-modified products and dry with much less odor. They are now the preferred choice in occupied homes where minimizing disruption matters. The trade-off is that water-based finishes are slightly less amber in tone than oil-modified, which means they preserve the natural wood color rather than adding the warm golden shift that older finishes are known for. For most modern floor colors and species, water-based is an excellent choice.